When it comes to interior plasterboard applications, the first paint job applied to the surface has a direct impact on both the visual appeal and long-term durability of the wall. In this article, we cover the industry standards for painting plasterboard, emphasize proper surface preparation, and share tips for achieving long-lasting, high-quality results. We also highlight Proaks products that support these best practices.
The Importance of Following Standards in Plasterboard Painting
While newly installed plasterboard may seem ready for paint, the process shouldn’t be random. There’s a systematic approach that must be followed. Ignoring this approach can lead to issues such as gloss banding, inconsistent finishes, early deterioration, and costly repairs.
In construction, every detail matters. Adhering to painting standards ensures you don’t have to choose between a smooth surface and surface durability.
Two Different Surfaces to Paint
There are two types of surfaces you’ll encounter when painting, and understanding their structure is essential:
- Gypsum Boards
- Joint Compound (used at seams and screw points)
These two components have different porosities and absorb paint differently. If not treated properly, these variations will ruin the overall appearance of the final finish.
Goal: Achieve a uniform, low-texture wall appearance through the use of multiple primer and paint layers.
What Do the Standards Say? The Three-Coat System
For newly installed plasterboard, the recommended standard is the Three-Coat System:
- Primer (Sealer)
This is a crucial first step. It equalizes the porosity of the entire wall surface and ensures proper adhesion for topcoats.
Tip: Use a high-quality primer formulated specifically for gypsum surfaces. - First Coat of Paint
Once the primer has dried, apply the first coat of interior wall paint. This layer builds up color and starts to fill in surface texture. - Final Topcoat
The final coat provides full color saturation, gloss consistency, durability, and resistance to daily wear and tear.
Skipping this process can lead to uneven sheen, visible patchiness, or even peeling over time.
Which Finish Level Should You Specify?
Before work begins, it’s helpful to define the finish level. This gives both the painter and installer a clear understanding of the project requirements.
| Finish Level | Description |
|---|---|
| Level 3 | Suitable for utility or non-decorative areas (e.g. storage rooms, restrooms) |
| Level 4 | The most common finish for paint-ready interior walls |
| Level 5 | Required for glossy finishes or areas with direct lighting to avoid highlighting surface defects |
If you’re using semi-gloss or high-gloss paint, a Level 5 finish is critical for a flawless result.
Surface Preparation Before Painting
Here’s a checklist for proper surface prep:
- Clean the Surface
Remove dust and residue using a damp cloth or vacuum. - Patching & Sanding
Ensure all screw heads and joint areas are flush. Sand down any bumps. - Priming
Apply an acrylic or PVA-based primer. - Respect Drying Time
Follow manufacturer-recommended drying times between coats. - Lighting Inspection
Use side lighting at a low angle to identify surface imperfections before painting.
Common Mistakes That Violate the Standards
- Skipping Primer: Causes uneven paint absorption
- Single Coat Application: Leads to poor adhesion and poor coverage
- Rushing Dry Time: Results in blistering or cracking
- Using Low-Quality Paint: Reduces durability and coverage
Special Considerations for Bathrooms and Kitchens
Moisture-prone areas such as bathrooms and kitchens require high-moisture-resistant primers and paints. Failure to use suitable materials can lead to:
- Mold and mildew
- Bubbling or peeling paint
- Discoloration
Recommendation: Combine moisture-resistant paint with Proaks access panels for long-lasting performance in wet areas.
Cost Benefits of Complying with Painting Standards
Even though construction schedules can be tight, cutting corners during the painting process often results in:
- Customer dissatisfaction
- Premature renovations
- Increased maintenance costs
Following painting standards not only ensures a quality job but also protects your business from long-term liability.
To achieve seamless surface integration and preparation, consider the following Proaks product solutions:
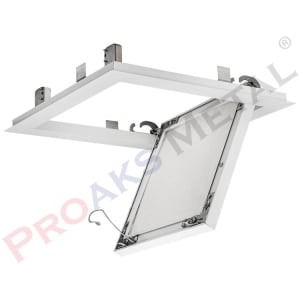
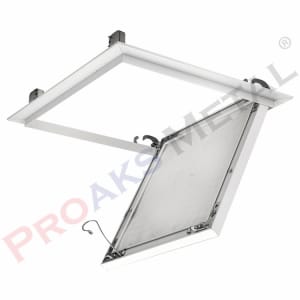
Access Panels (Proline Plus, Zerostar, Prostar)
- Designed with 12.5 mm thick plasterboards
- Fully paint-integrated and flush to the wall
- Options available for fire and moisture resistance
Suspended Ceiling Accessories
- Smooth surface joint tapes and drywall screws (Sharp Point Drywall Screw PBH S or Self Drilling Drywall Screw PBH SD)
- Clips and brackets to minimize vibration-related cracking
Finishing Profiles
- Aluminum Z Profiles and T Profiles create clean visual boundaries
- Perforated corner profiles support joint compound application and sharp, smooth edges
Frequently Asked Questions
No. Even the best paints require a sealer on plasterboard to balance surface porosity and avoid gloss variations.
Only in industrial or hidden areas where appearance doesn’t matter. Otherwise, two coats are the minimum requirement.
Acrylic latex paints are best for interior walls. In humid areas, go for semi-gloss or moisture-resistant formulas.
Standards Are the Foundation of Quality
Painting plasterboard isn’t just about appearance it’s about creating a durable, consistent, and professional-quality surface. Following painting standards and using reliable products such as Proaks access panels, partition profiles, and ceiling accessories ensures that the end result satisfies both installers and end users.
For a long-lasting, easy-to-maintain, and visually flawless surface, always start with the right products and a solid process.